Disclaimer: We strongly recommend exporting a record of your current client assignments by team member before disabling any team members or reassigning clients. This ensures you maintain an accurate record of client allocation changes and facilitates proper reassignment to the appropriate team member(s). Once a team member is disabled, their list of assigned clients will no longer be accessible, making this step essential to preserve assignment records.
Log into your TitleCapture account.
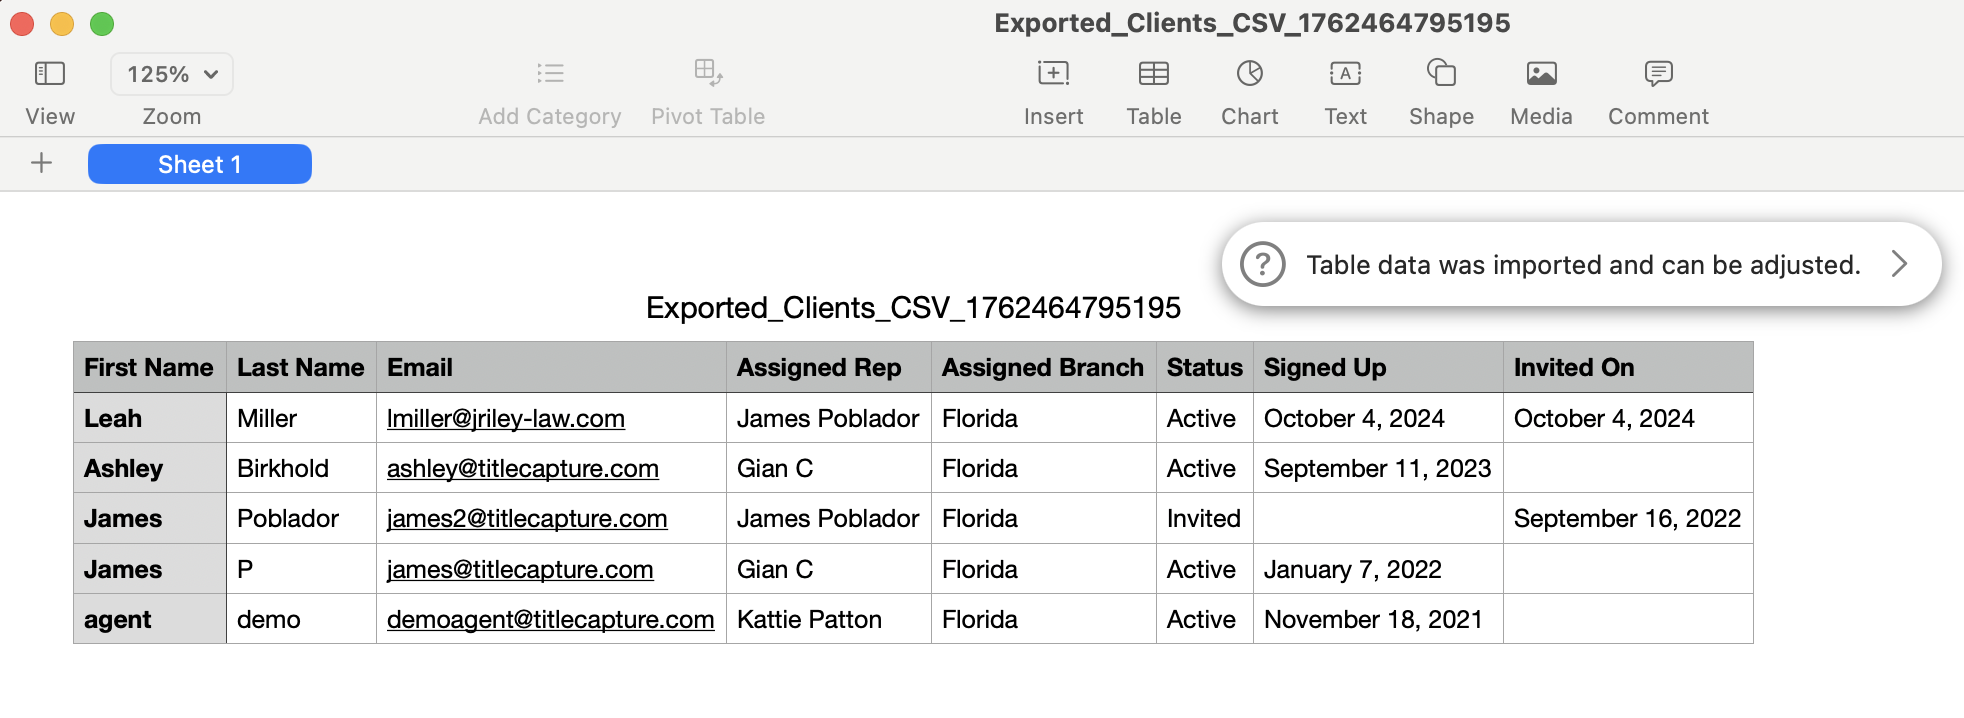
From the app's home screen, navigate to the "Clients" tab. Next, click the three dots icon at the top-right. Then, select the "Export Clients" option in the dropdown menu.

You will see a confirmation that your Clients have been exported and you will have a CSV file downloaded on your PC.

Your Client and Team Member data can be saved and sorted for future reference.

Important Note: Before disabling a team member's account, you must ensure that their assigned clients are safely transferred to another Team Member.
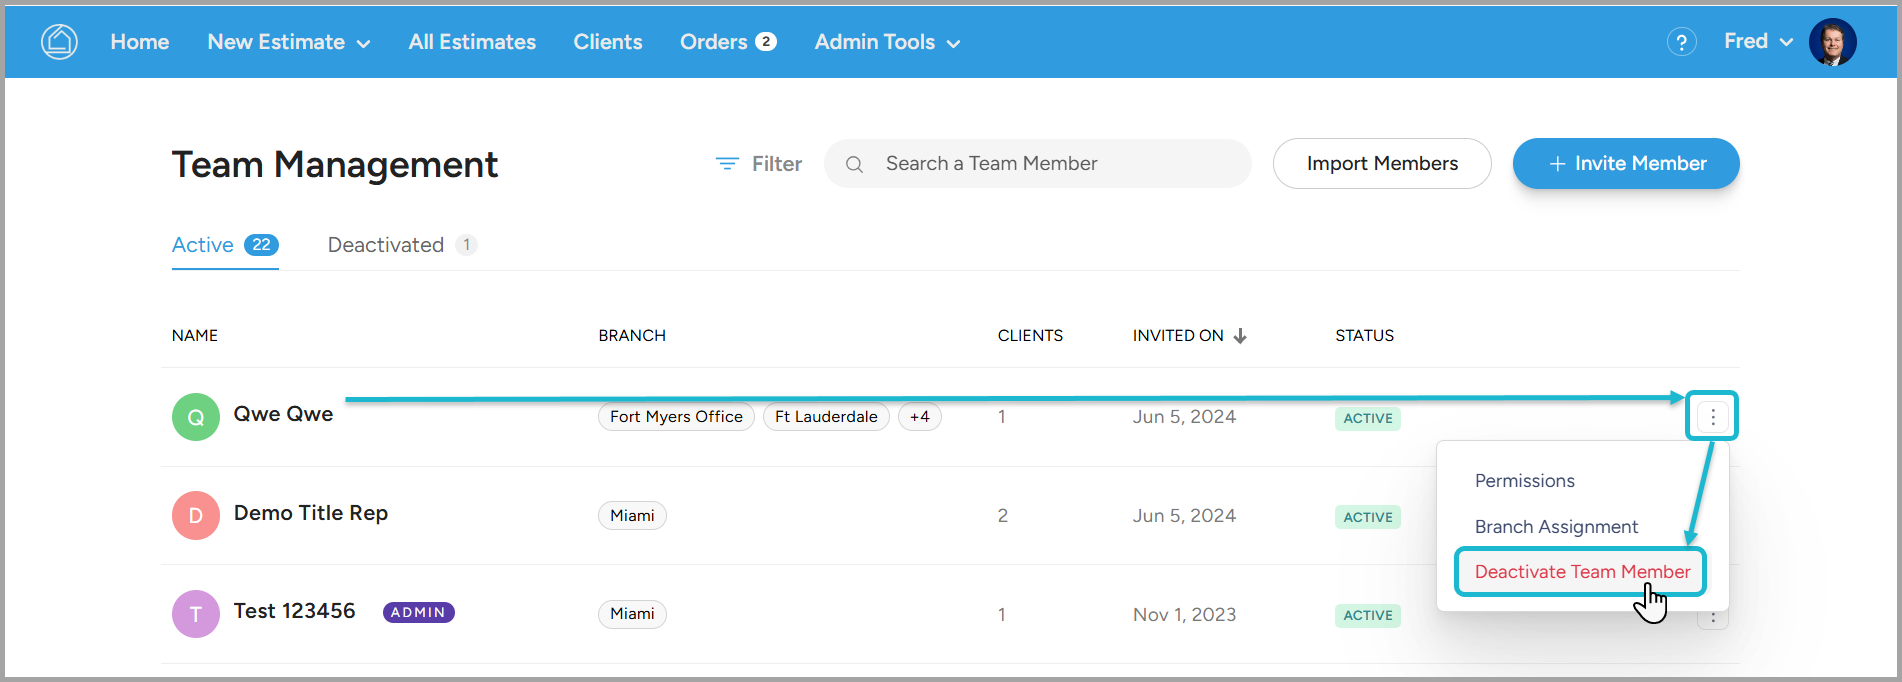
From the app's home screen, navigate to the "Admin Tools" dropdown and select the "Manage Team Members" option. This will take you to the Team Management page.

Select the three docs icon next to the Team Member, then within the dropdown, select the Deactivate Team Member option.

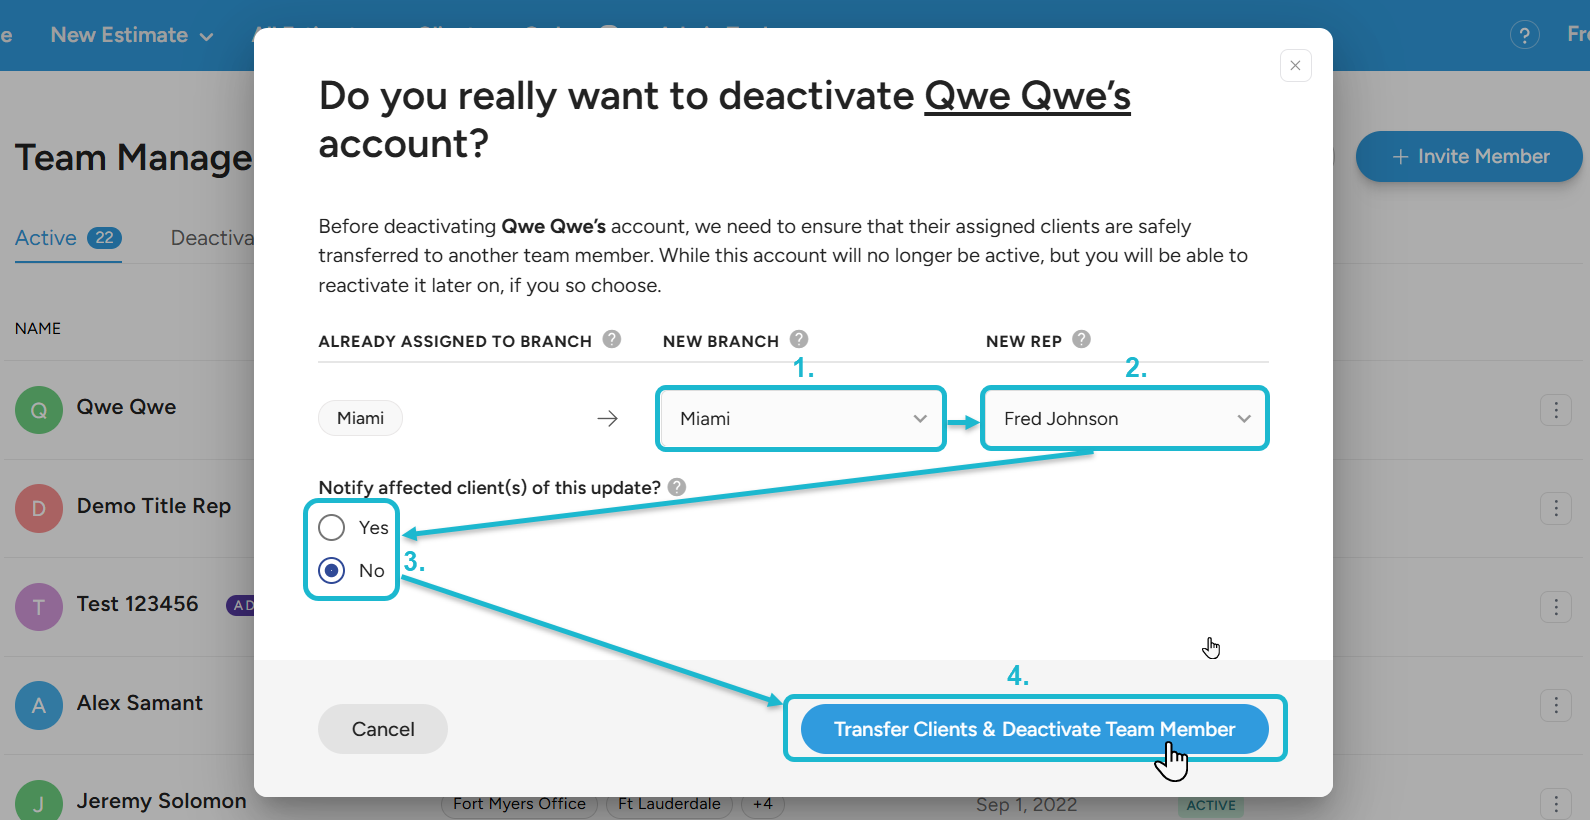
This will automatically open a box requiring you to transfer assigned clients to a new team member, where you will complete the following steps (also shown in screen shot below):
First, click the dropdown arrow in the New Office field and select an available office from the list of available options.
Then, click the dropdown arrow in the New Rep field and select an available office from the list of options. Alternatively, you can begin typing the first few letters of any team member's name and the system will populate any matching options.
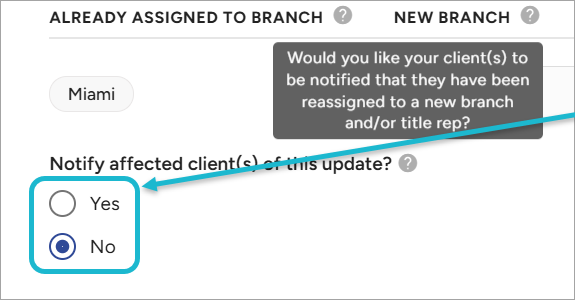
Confirm if you would like to Notify affected client(s) of this update.
See important details in "Sending Client Notifications" section below.
Last, click the "Transfer Clients & Deactivate Team Member" button to complete this process.

Once completed, you will see a pop-up confirmation that this team member has been deactivated.
The "Notify affected client(s) of this update?" toggle (shown in Step 3. above) is a new feature that allows you to control whether clients are notified about this change. We strongly recommend selecting Yes to ensure all clients are informed of their assigned Title Rep. This helps them know who to contact at your Title Company for any questions or needs and reduces the risk of losing engagement with your clients. If you select No, we recommend proactively communicating this change through another method to ensure your clients know their new point of contact.
Disclaimer: If the Yes option is selected, clicking Transfer Clients & Deactivate Team Member will automatically send assigned clients an email notification about their new Title Agent (Title Rep) contact. If No is selected, clients will still be reassigned but will not receive a notification.

From the app's home screen, navigate to the "Admin Tools" dropdown and select the "Manage Team Members" option. This will take you to the Team Management page.

Find the Deactivated client tab at the top-left of the Team Management screen. Then, click on the three docs icon next to the Team Member and then within the dropdown, select the Reactivate Team Member button.

Once completed, you will see a confirmation that this team member has been reactivated.
You might also be interested in these related articles:
 Editing Team Member Permissions
 Adding & Inviting New Team Members (Title Reps)
If you need further assistance, please send us an email at support@titlecapture.com. We are more than happy to help!